Navigation bars are everywhere! Just like Helvetica, once you notice them you’ll start seeing them wherever you look, or at least in many of your favorite and most-used apps.

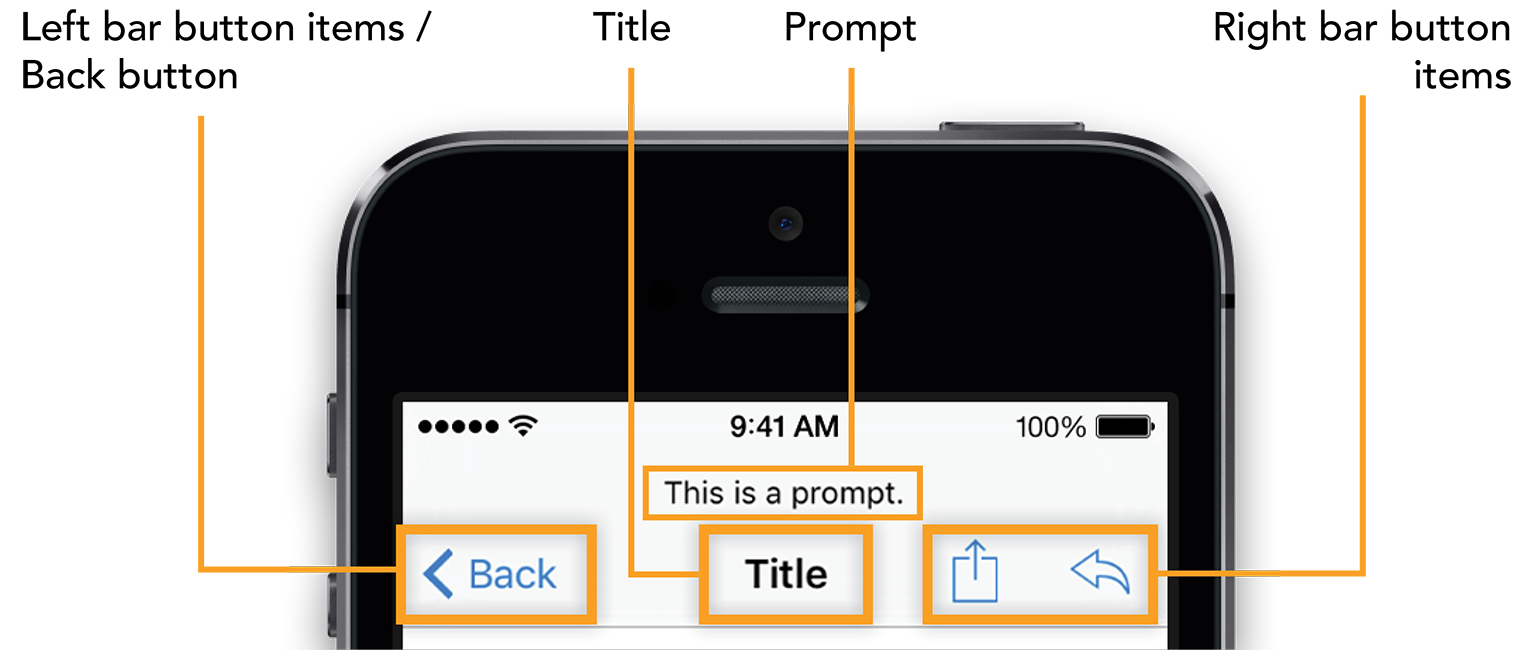
title or titleView for displaying the title of the current screen; a prompt for providing additional descriptive text; leftBarButtonItems; and rightBarButtonItems. The navigation bar gets the values for these four components from the currently displayed view controller's navigationItem property. When a view is pushed, the left bar button items are replaced by a back button. There is also a pre-made edit button available for your use on UIViewController that will toggle to "Done" when your view controller is being edited.
Like street signs, navigation bars help us navigate apps by providing us with a familiar interface for figuring out where we are within an app. A standard navigation bar usually has a title and, when appropriate, a back button. Navigation bars almost always sit at the top of the screen. And because navigation bars are usually static and easily accessible, they also often contain buttons for key actions like editing, sharing, sorting, or accessing a menu.
Navigation and navigation bars are such a central part of user interface design that Apple has provided us not only with UINavigationBar, a standard pre-made navigation bar class, but also UINavigationController, a container view controller that handles the hierarchical display of views. Using them is as easy as dragging and dropping them into your storyboard using Interface Builder.
You’ll notice though that lots of apps use custom navigation bars, whether to better match their app’s aesthetic or to add functionality not offered by the standard UINavigationBar class.

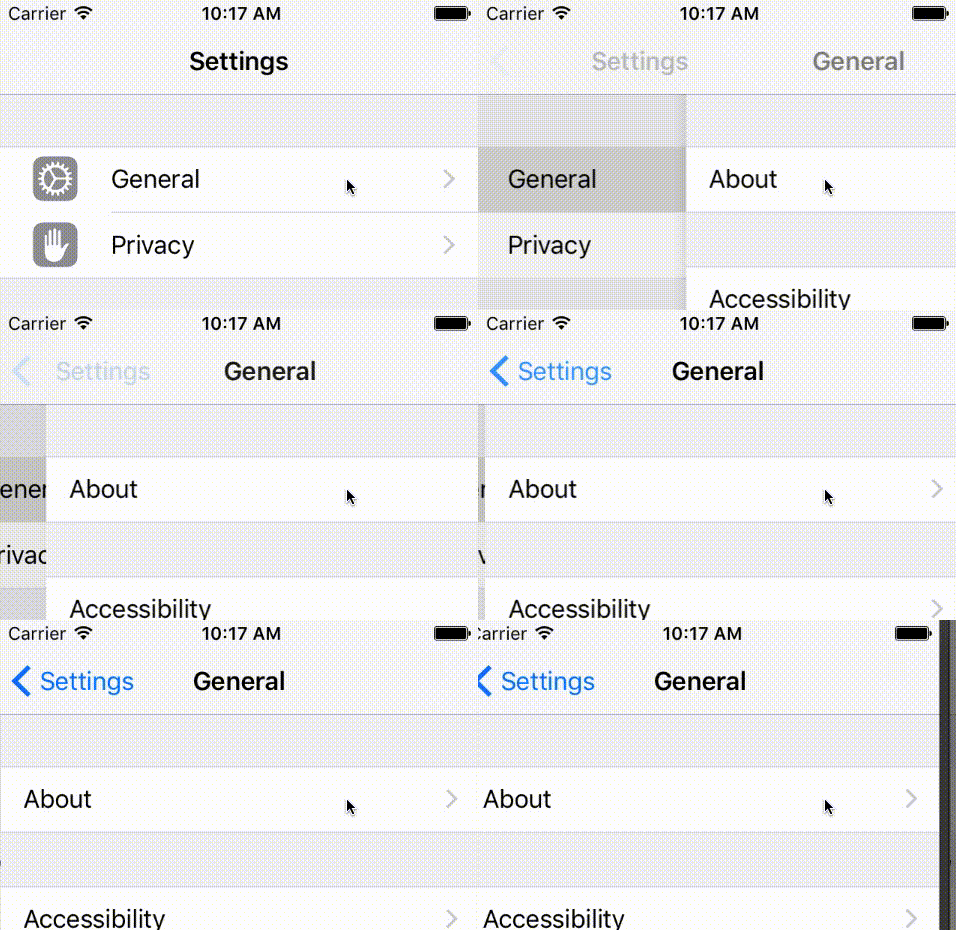
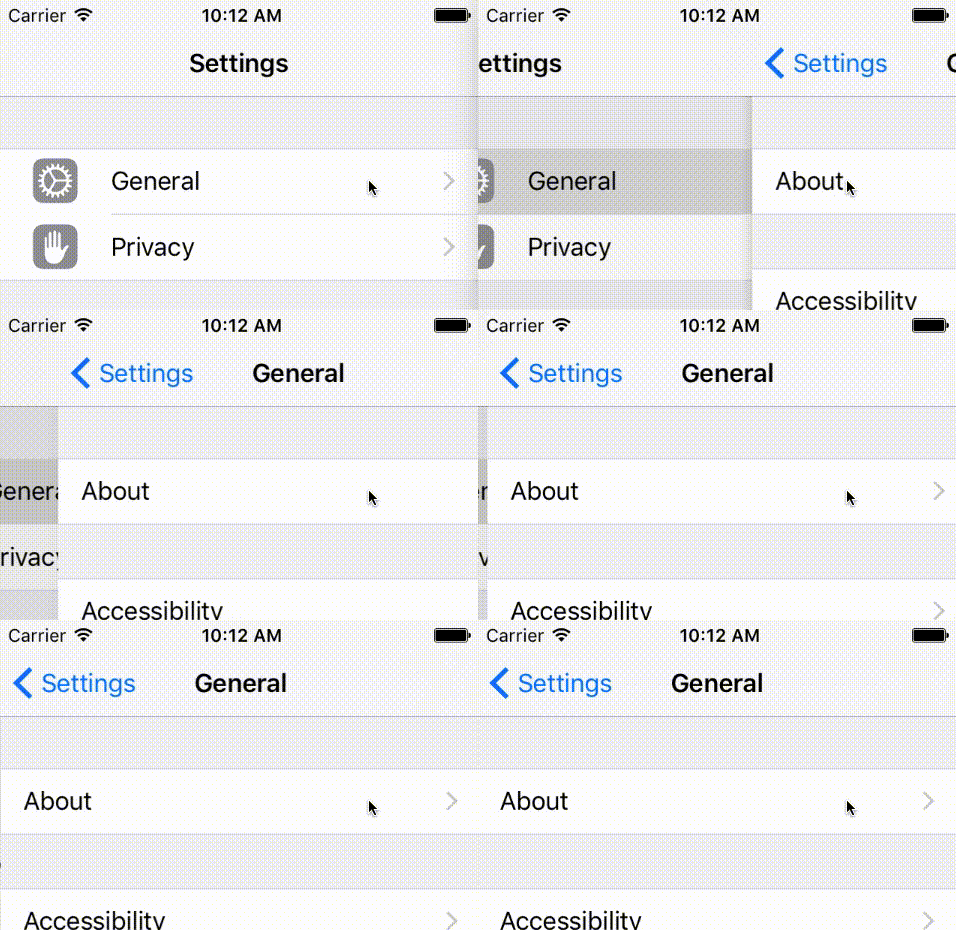
Traditionally, adding your own custom navigation bar has been a hassle. Some people “fake it” by adding their navigation bar as a subview and hiding the standard UINavigationBar provided by UINavigationController. However, eagle-eyed observers will notice that this creates a behavioral inconsistency: while the standard UINavigationBar remains in place while segueing between views, navigation bars added as a subview slide in and out with the view.


Most users of your application won’t notice the difference. However, any changes to your navigation bar (like updating your navigation bar’s background color) won’t be persisted across view controllers, as each view controller uses its own navigation bar. In addition, when a new navigation bar slides in with your view, it might not be entirely clear to the user whether a new screen is being pushed onto the existing navigation stack or whether an entirely new navigation stack is being pushed onto the screen.
One way to solve this problem is to set your navigation bar from within a subclass of UINavigationController via -[setValue:forKeyPath:]. This will solve the “sliding navigation bar” problem as your custom navigation bar is added not as a subview of an individual view controller’s view but as a replacement for UINavigationController’s navigation bar. However, this method also means that your navigation controller is defining your navigation bar. In most cases this will be completely appropriate. However, if you’d like the flexibility to use different navigation bars within a single navigation hierarchy, your individual view controllers should really be the entity defining which navigation bar to use.
As such, I’ve created a category on UIViewController called UIViewController
#import "UIViewController+CustomNavigationBar.h"self.customNavigationBar = <your navigation bar>;self.enableCustomNavigationBar = YES;
In addition, your custom navigation bar should conform to the CustomNavigationBar protocol defined in CustomNavigationBarProtocols.h. I also recommend checking to see if the custom navigation bar is already set when the view loads; if so, then the existing custom navigation bar should just be reused rather than re-set.
The UIViewController+CustomNavigationBar category also adds three new properties to UINavigationItem: hidesLeftBarButtonItems, hidesTitleView, and hidesRightBarButtonItems. These BOOLs allow you to suppress the display of UINavigationBar’s left bar button items, title view, and right bar button items without having to set their corresponding properties on UINavigationItem to nil. For example, if your custom navigation bar makes use of UINavigationBar’s standard title view and right bar button items but wants to hide the left bar button items, you could override -[setItems:]self.topItem.hidesLeftBarButtonItems = YES.
While UIViewController+CustomNavigationBar makes adding a custom navigation bar super easy, there’s a lot of complexity hiding beneath the surface, some of which are not entirely kosher (like swizzling methods within a category). All of the code for UIViewController+CustomNavigationBar is available on GitHub, and if you have suggestions for improvements please do fork, edit, and submit pull requests! The two main issues of which I am aware is that there’s currently no NSNotification sent when a navigation item’s titleView is changed and the navigation bar doesn’t perform a fade transition when moving between view controllers.